While not thus far reflected by the contents of this page, the primary focus of my formal education since high school has actually been electronics.
And whence the fascination with electronics? The modern miracle of recorded music! More than any desire to make LEDs blink or robots preambulate or electromagnetic death rays “ZAP! ZAP! BZZZZOT!,” the emotive power of music has driven me to spend considerable time and energy learning the ins and outs of electronics and getting my hands dirty.
Perhaps if i’d grown up with a jazz quintet at my beck I’d be fixing clarinets, but if I wanted to hear interesting music as a teenager, I’d press play on a CD and listen to the hi-fi.
My first real stereo was my dad’s old one, a 70’s era amp powering a set of 3-way Phillips kit drivers in speaker cabinets that my uncle built. The components were tantalizingly simple enough that I could imagine myself working on them, and so over the years I’ve undertaken to do so in my own projects.
These days, my audio diet is 95% digital sourced from a computer and 5% LP’s, but either way the signal travels through equipment I’ve made or messed with. (Yes, even with a computer source: I have upgraded the more important capacitors in my PC sound card, because, well, why not?)
Many find audiophilia a rewarding (and expensive) hobby without ever delving into the technical details. The purported benefits of one boutique product over another often moves well beyond design and engineering into mysticism and placebo effects. I can credit one Rod Elliot and his authoritative articles with illuminating my understanding of the topic of audio reproduction in general, and as the source of circuit diagrams for some of these projects specifically. His practical approach to audio equipment design espouses putting the effort where measurable results can be seen, and I highly recommend any of the articles that discredit the snake oil dealers who sell expensive cables and widgets that do little to improve the sound of a hi-fi system but dramatically increase the cost.
That being said, why bother with DIY hi-fi, when you’re reinventing the wheel to make one-off items with amateur abilities and inferior tooling? The requirements are pretty clearly defined, and well considered by others who know better what they are doing and can benefit from economies of scale to make superior equipment for similar or lower cost. It is of course as much about the journey as the result. Sound quality is one reason, and for simpler projects in particular, frugality can be another, but mostly it’s about having a personal stake as creator of the modern miracle ongoing in my living room.
Most of these project have turned out to be larger undertakings than I anticipated. This is as true of my furniture projects described in other posts as of electronics. Stubbornness is an asset, as is a degree of strategic self-deception. While with each project I can estimate the time required more precisely, and build in the safety factors for little mistakes that inevitably crop up, I find it helpful to cultivate a certain naive underestimation of the complexity involved in a project in order to jump into it with energy and enthusiasm. The stumbling blocks make themselves known soon enough, one might as well run into them headfirst with the hope of bowling them over. In spite of years of formal schooling and many hours of hands-on practice, there remain nearly limitless opportunities to learn more about the art and craft of electronics.
Headphone Crossfeed
As the nerds at head-fi will be quick to point out, it’s easier to get low-noise, low distortion, high dynamic range audio reproduction from a set of ‘cans’ than a pair of speakers. The reasons for that are manifold: it’s easier to provide clean amplification at low power; it’s simpler to design a wide bandwidth driver, where one transducer handles bass, mid, and treble, and low power; and having a single full-bandwidth driver eliminates the need for a crossover, which removes the possibility of distortion. Finally, by placing the speakers immediately beside your head, you remove the acoustics of the environment from the equation. You are of course still stuck with the acoustic effects of your own skull, but presumably that’s a tradeoff you’re comfortable with. Probably someone somewhere makes a weighted audiophile hat to eliminate those pesky skull resonances. If upon reading this you decide to go into business making those yourself, please consider paying me royalties for the idea.
Wow, all that’s pretty great. A pair of headphones, like my DT-770s, a dedicated headphone amp, like my Gilmore Lite, a quality audio source, like my chaintech av-710, with it’s unusually high-spec DAC chip, and you’re good to go! One of the selling points of my Gilmore lite is the parallel RCA connections on the back that let me plug in my living room stereo amp at the same time as the headphone amp, so I don’t even need to switch anything to go from headphone listening at the desk to rocking out while I cook dinner.
But wait… it turns out most music is mixed for stereo listening on speakers, in a room. Simply put, when we listen to speakers, some of the sound from the left channel hits our right ear, and some from the right hits our left, and the blending in space of the two channels helps provide the ear with positioning cues and creates the ‘soundstage’ of the music. Worse yet, hard channel separation from headphones can be fatiguing to listen to after a while. The solution to that is to blend some of the signal together electronically.
There are plugins for PC media players that do this in software, however, it’s easy to leave those turned on, and then what a shame-filled moment to realize you’re listening to the stereo with crossfeed on and needlessly mixed together midbass for who knows how long before noticing!
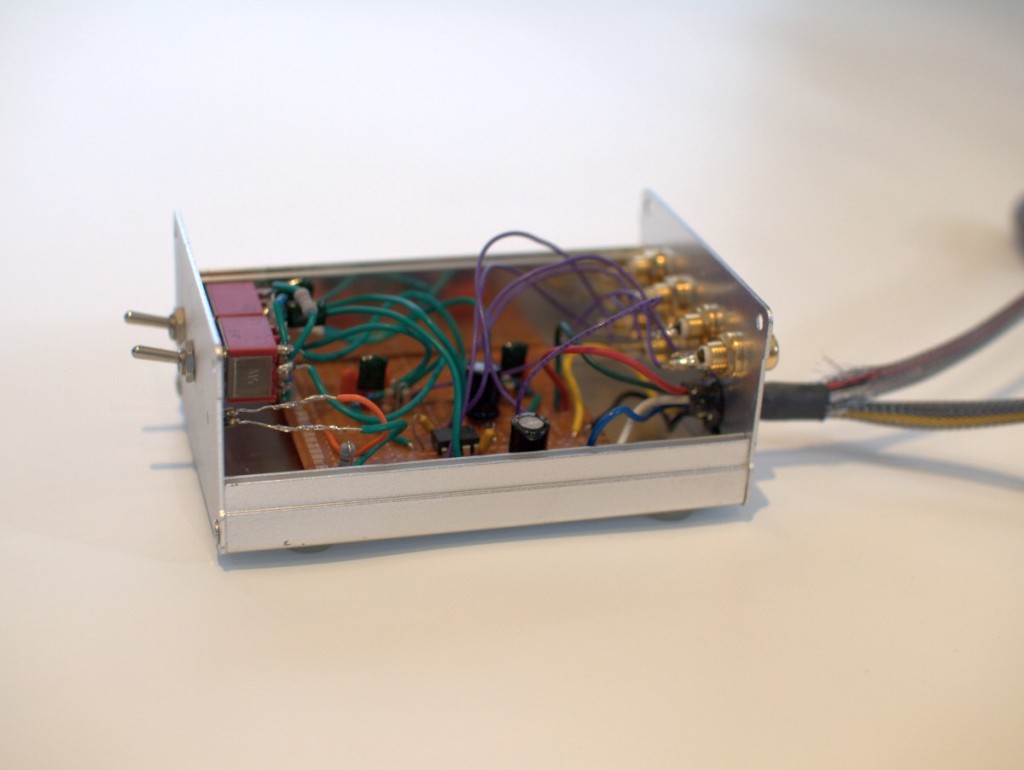
The obvious workaround is a dedicated crossfeed effect unit. The circuit is based on the work of Chu Moy, who over the years has made a few notable contributions to hobbyist hi-fi headphone audio. Because the effect unit was destined to be connected in parallel with the input of my living room stereo, I added an op-amp buffer to the input for pedantic audiophile thoroughness. The whole unit is powered by a loop through connection from the power supply of the Gilmore Lite, which means one less power cord at my desk and more than a few dollars saved.
I actually built two identical units, as a friend of mine with the same headphone amp had the same concerns to address. A quick fun build on protoboard with components bought retail from Lee’s Electronics, a handy local source for electronics parts.
 Bi-Amped Stereo, with active crossover and phono preamplifier
File this under ‘needless complexity,’ it’s another metal and silicon manifestation of pedantic audiophilia. Rod Elliot describes the rationale behind active bi-amplification in a series of articles on his site, and that site is also the source for the circuit schematics used in this project. A bi-amplified system with active crossovers has more headroom, simpler loads for the amplifier, and better crossovers than a conventional 2 channel stereo with passive crossovers in the speaker cabinet, which in theory results in superior sound, though I personally have no objective way of measuring the sound quality. I find it convincing that many powered studio monitors use this principle, so, well, why not?
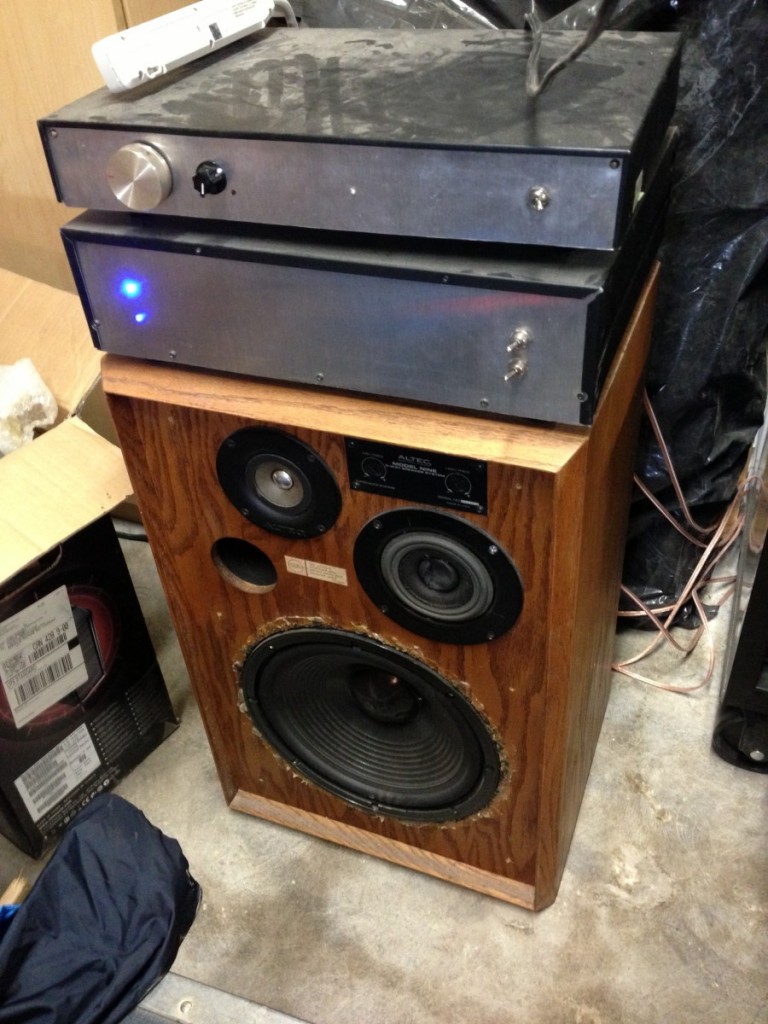
This was another budget, experimental project, though parts costs add up quickly. The chassis is reclaimed, slightly spruced up with a new sheet metal face. All circuits are handmade on protoboard. The relay, visible mid-rear in the image above, grounds the outputs when the power goes off to prevent big transients when the op-amps shut down from going to the power amp and making the speakers do alarming things. This preamp provides signal to a handmade 4 channel chipamp to actually move air and make sound.
This project is currently driving some vintage Altech Lansing Model 9’s with replacement found-in-the-alleyway 12″ drivers, with crossovers removed and new double binding posts added. This system is now demoted to use as a big, loud, ugly, but good sounding shop stereo, as I’ve gone to some much sleeker Paradigm Monitor 7s and a NAD amplifier (with wonder of wonders, a remote volume control) as my home hi-fi.
Phono preamp
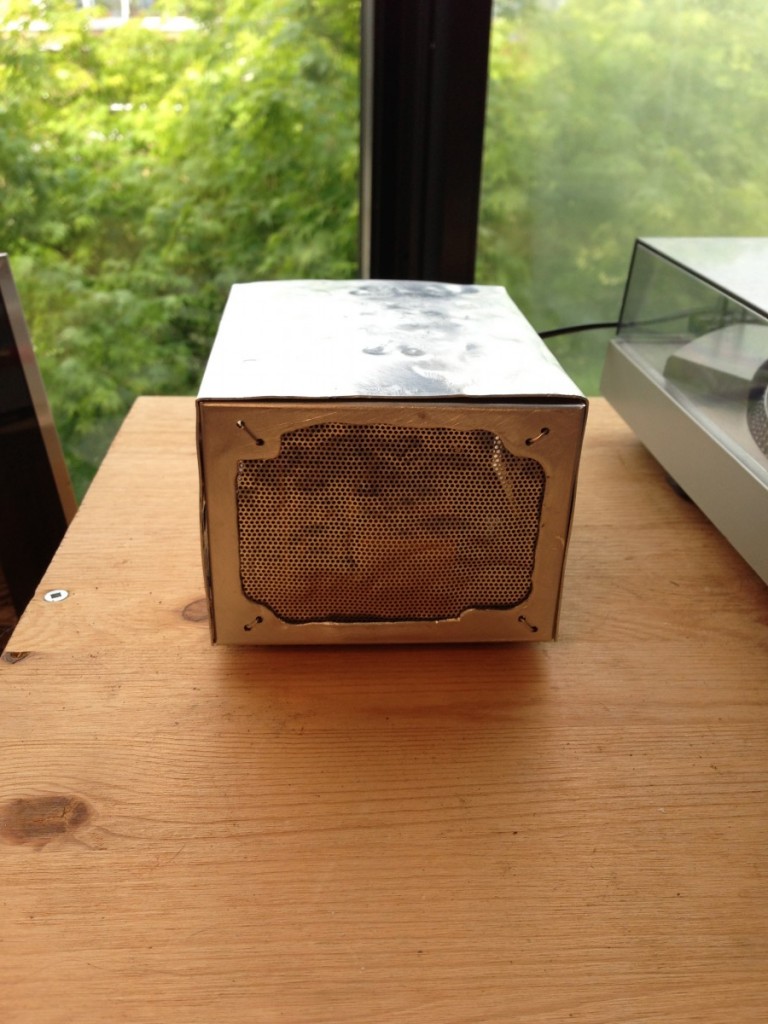
Since i’m not about to bother with spinning vinyl in a dusty, crowded, and vibration-addled shop space, and my newly purchased home stereo came sans a phono channel with RIAA equalization and extra gain for playing records, I snipped the phono preamp module from my handbuilt preamp/active crossover and slapped it into a case for use at home. For the ultimate in a low-noise power supply, as well as ease of assembly, it runs off of 2 9V batteries.
The case was bashed out of scrap material and distressed to give it a more exotic appearance, as a fun and hasty departure from the more typically modern, clean designs I tend toward. Power LED’s backlight the mesh, but they’re almost unphotographically dim since I’m trying to conserve battery power in this instance. I may rebuild this in a more substantial, finished, and wall-powered form in the future, but for now it gets me listening to my vinyl collection again and adds some whimsy to the home setup.
I’m pretty happy with my current setups, at my desk, in my living room, and in the shop, so if there’s any tweaking and upgrading to be done, it will be focused on proper speaker positioning and room acoustic treatments. I have experimented with homemade bass traps but decided the results were negligible in the room I’m listening in, though many spaces do benefit from some acoustic dampening…. although, it would be nice to listen to music or podcasts when soaking in the tub, and I’ve got some LM380 power amplifier chips floating around in my parts drawer, so probably the next project is a custom bathroom mini system because, well, why not?


